DIY: Emmy Award Costume
Visit either Salvation Army or Goodwill, in the nightgown section. Sew in some improvements to make the dress like the one on the Emmy statuette.
Gold Body:
Consult with a the costume shop on gold body paint. The main thing you want to avoid is paint that comes off when you sweat or if someone touches you. Purchase a powdered mix that combines with a liquid seal. You should consult the label if you are allergic or have sensitive skin. Do a test application (ALWAYS A MUST) to see if the paint runs, cracks, flakes or gives me a rash. Buy paint brushes at fabric/art & crafts store so You can cover a lot of area such as the back and arms. While getting smaller brushes to work around the eyes and lips.
Your entire body (Only the visible areas) is painted with this gold makeup found at a theatrical costume store, it’s very lightweight, and pretty difficult to get off, but turns out beautifully. Cover your entire face, legs, and arms and had about an hour long shower after the night. Have someone help you wash it off.
You can find gold lipstick at a Target but you could get it at Walgreens/Osco pharmacy as well. Gold sandals were an easy find.
Globe:
For the globe, use (purchase) 5 kids size hula hoops (they make adult sized ones). Then tie-wrapped/zip tied them together. Each crossing of the hoops needed 4 or 5 ties. After securing them all tightly, take wire cutters or scissors and trim the excess away. Put a bit of duck tape over the tie ends to keep from cutting my/your hands (they tend to be rather sharp) and took 2 cans of Gold Spray Paint (make sure it will stick to plastic) and coated the globe. An Emmy also has “atoms” flying around the inside of the globe, glue 5 of them where the largest number of tie wraps/zip ties were located on the globe. Gold spray paint finished them off.
And alternative is to make the ball/rings you are holding from several gold rings found at a thrift store, and foam balls from a craft store spray painted gold. It is designed so that it is collapsible, and easy to take around with you.
Options: Wings Design One:
The biggest challenge are the wings. They have to be sturdy but not too binding. Take two sheets of foam core and hand draw one wing. Then after box cutting out the pattern, over layed it on the other foam core sheet so they matched and cut again.
Once again the arts & crafts store has all you need. MICHAEL’S OR JOANNE’S fabric craft stores are easiest to find. Pick up some clear plastic bra extensions there as well. This was to secure the wings to the torso and shoulders. The straps would run over both shoulders like a backpack and also have a strap running underneath your breasts and attaching to the two “backpack” straps. Due to the size of the wings you can’t glue the straps to the foam core. It is too heavy. Toyed with the idea of staples but that is rubbing on your bare skin. So purchase a light flexible foam paper, MICHAEL’S had it and it is in the construction paper area (Think they use it for kids projects).
Glue, the foam paper around the wings where they would be touching the shoulder blades. Think of a hard back book and where the pages would be that would be the wing. The cover is the light foam paper folded like a taco over that wing area. HOPE THIS MAKES SENSE!
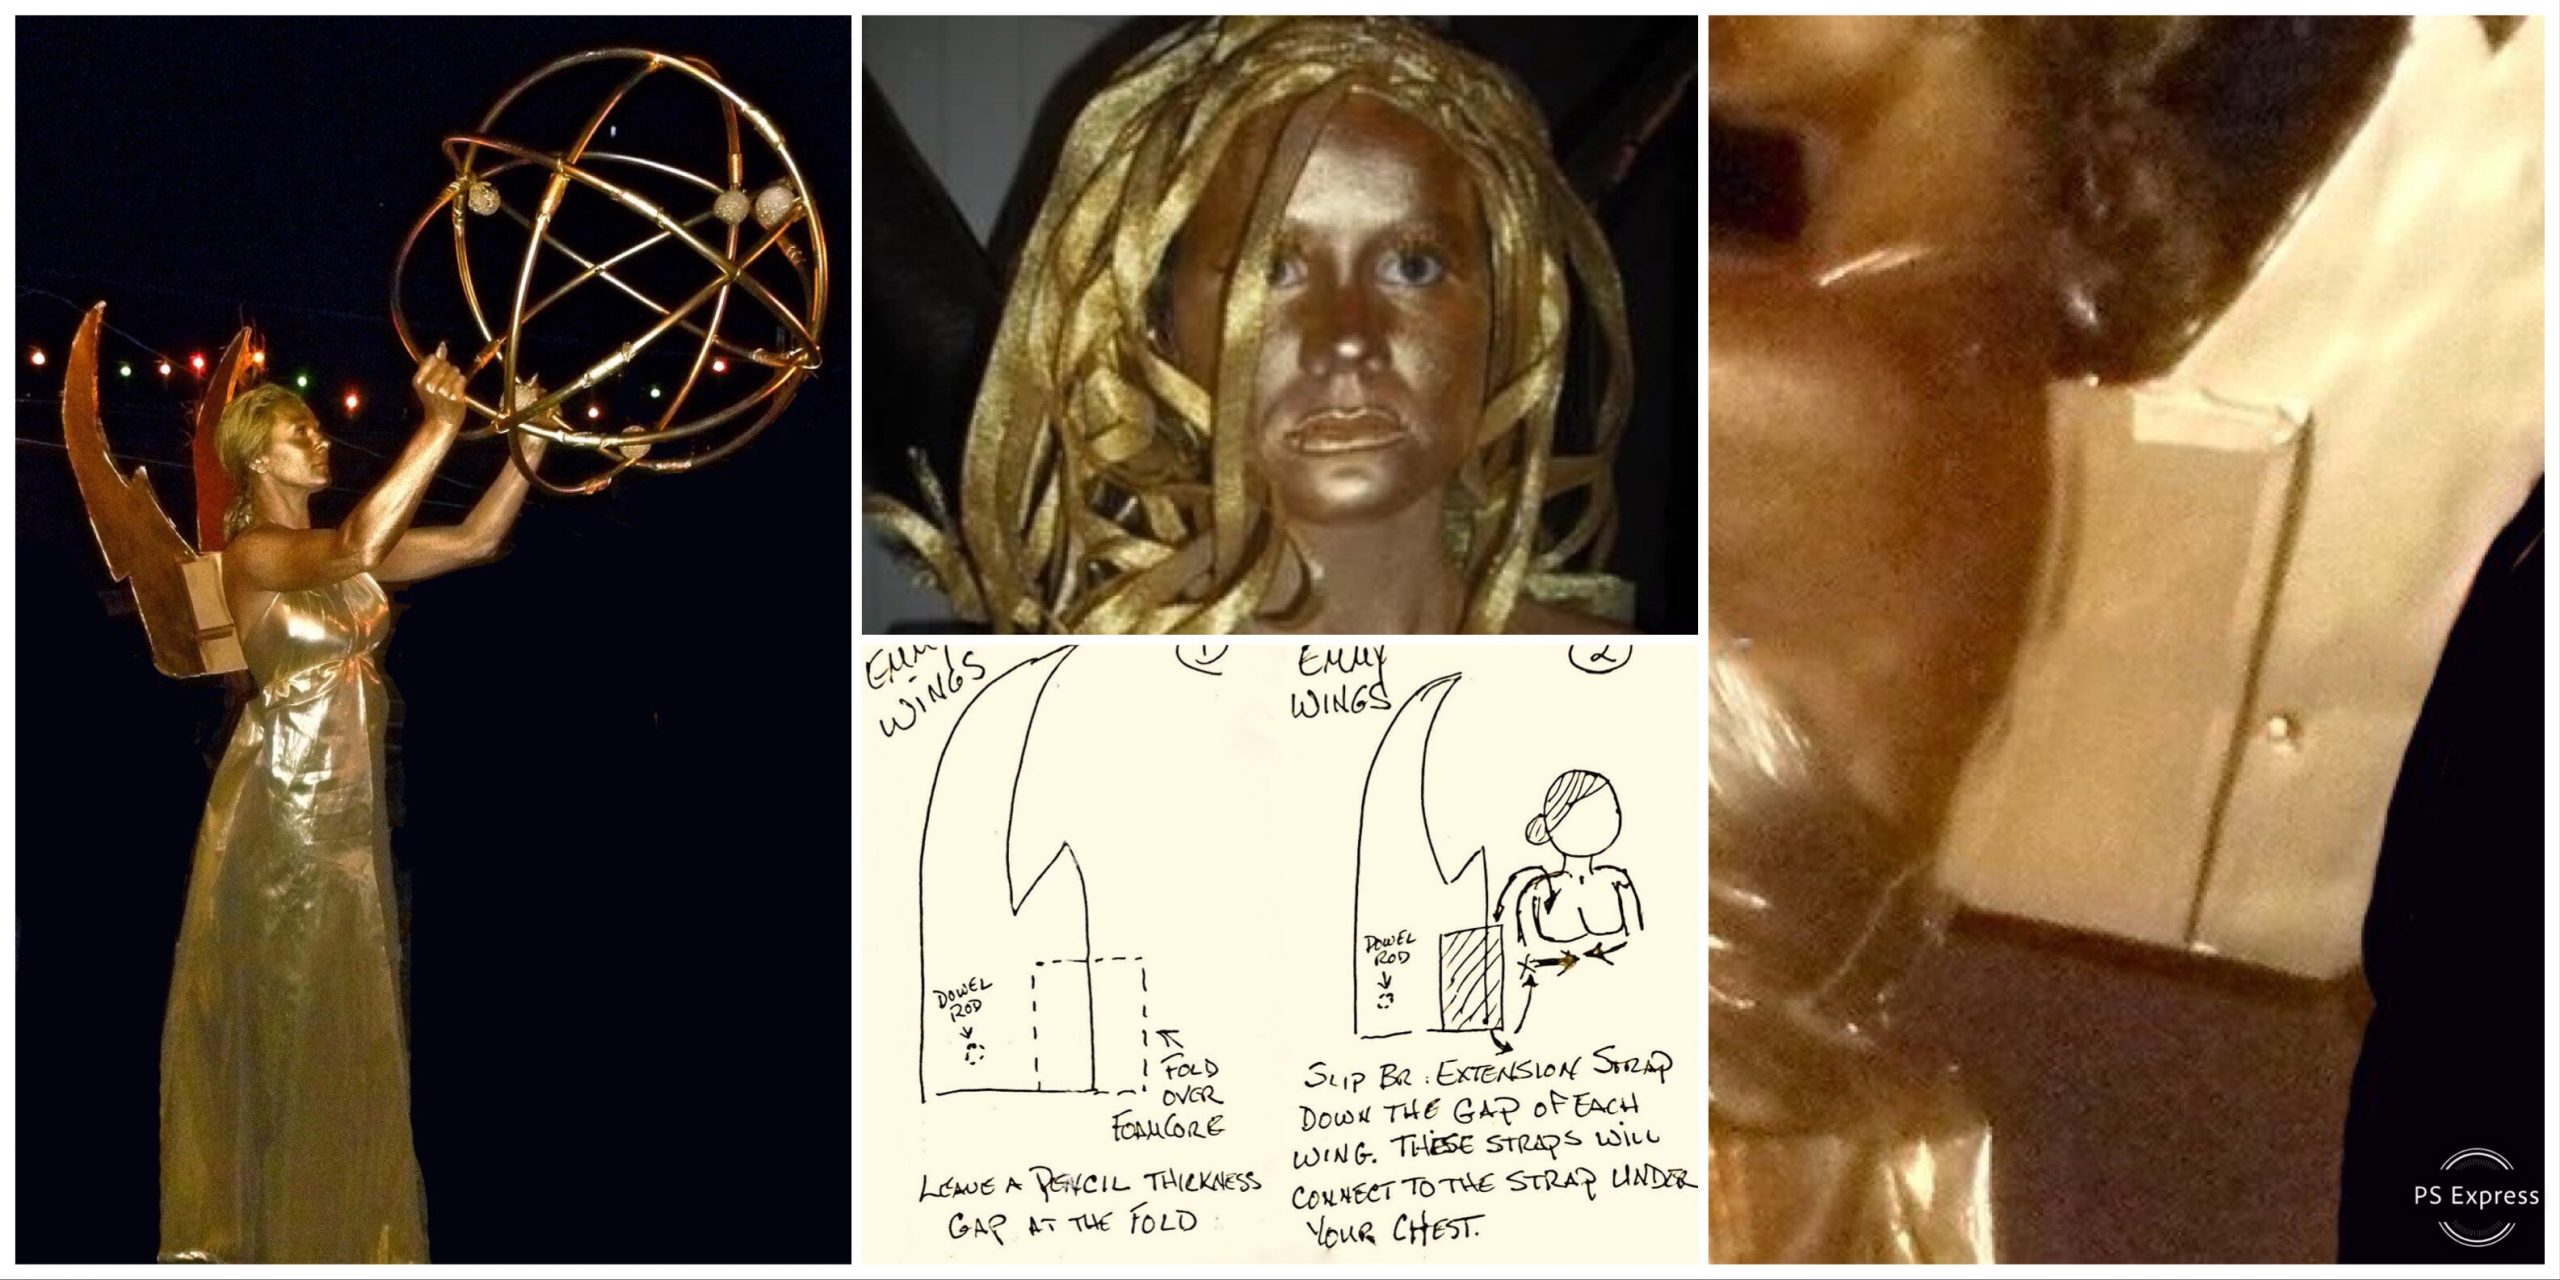
Leave a pencil size thick gap to fit thread your straps thru….you are setting this all up so the wings are your “backpack”. Another can or two of gold spray paint on the wings.
Options: Wings Design Two:
One modification could be the wings “flopped” a lot because they were not secured to each other, like two loose rudders on the back of a boat LOL. To fix this issue, take a wooden dowel rod, paint it gold and stuck it thru the wings near my shoulder blades. Sheared the excess lenght off and glued. This steadied the two wings so if they did “flop” they did so in the same fashion….
You may be able to come up with a better way to secure the Emmy wings but this works well for the most part.
Sewed a pattern for the wings and stuff them. Fashioned a harness out of old belts, and PVC plumping pipes to go under the dress. The cool thing about the wings is that they are free flowing. They move when You walk. It’s because attached is a rod to each individual wing, and just sat it in the pipes strapped to the back.
Hair:
Purchase yards gold ribbon, and pieced it together piece by piece on a wig cap…using only hot glue, and your hands to curl the wire in the ribbons.
Use gold HAIR spray paint to do your hairdo and secured it with couple of barrettes.
Wrap Up:
Depending on your level of sewing ability, life schedule and to allow for drying time it could take a couple of hours a day for about 4 days to get this right.
Friends and the public will be amazed by your creation, and you will be frequently asked to take selfie pictures with them.
It will be a big win for you in the home made costumes….and hope you LOVE making it.


