DIY Light Box
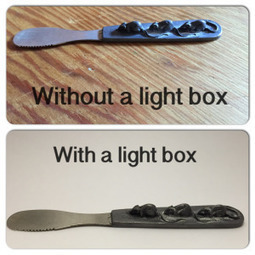
If you've read the post on how to take great product pictures, you've read about the importance of light in your pictures. When using natural light isn’t possible or just doesn’t work for your particular needs, a light box is often the next best alternative. This post will demonstrate how to make a DIY Light Box. No need for any fancy materials or supplies. Many of the items are probably things you have at home already!
List of Supplies:1. Cardboard box2. Box cutter or X-acto Knife3. White printer paper or White Tissue Paper (the type found in the gift wrap section)4. White poster board5. Portable lamp6. 100 watt white light bulb7. Double sided tape (or regular tape that you roll up on itself)Directions
About the cardboard box. It should be large enough to hold the items you are photographing but not so huge that you can’t store or transport it easily. After assembly, remove the top flaps of the box. You want this part to be open. Next, using your box cutter or X-acto Knife, cut the sides out of the box leaving a small border around the edges. You are going for a “picture frame” look on all sides. Do not cut out the bottom!
Once all your sides are cut out, apply double sided tape to the inside of each “frame”. This is where you will be applying the white paper. The goal is to (as seamlessly as possible) cover the inside of the box with your paper. We are trying to make an environment as free from color and shadows as possible.
Voila, you’ve made a light box! Now get busy taking pictures and posting your stuff. I find it works best if you go into a dark room and put the lamp as close to your box as possible. If you are not getting the desired lighting, add more lamps. I’ve seen examples online using up to 3 lamps at a time.


