Tag Archives: how to

How To Take Great Product Pictures

How To Take Great Product Pictures

Want to know how to take great product pictures?

In order to convey the awesomeness of your creations, you need great pictures. This peost will share tips on how to take great product pictures.

1. Be sure to set aside enough time to get the job done.

Any job that is rushed is probably not going to be your best work. It makes sense that if you want to get great results, you have to put some time into it.  Try to make this time uninterrupted. Pets and children should be otherwise occupied!

2. Gather all your products to be photographed well in advance.

You’ve worked so hard to set this time apart, make the most of it! Gather all products, cameras and props well in advance of your start time. This will ensure you don’t have to waste precious time.

3. Take multiple pictures of each item.

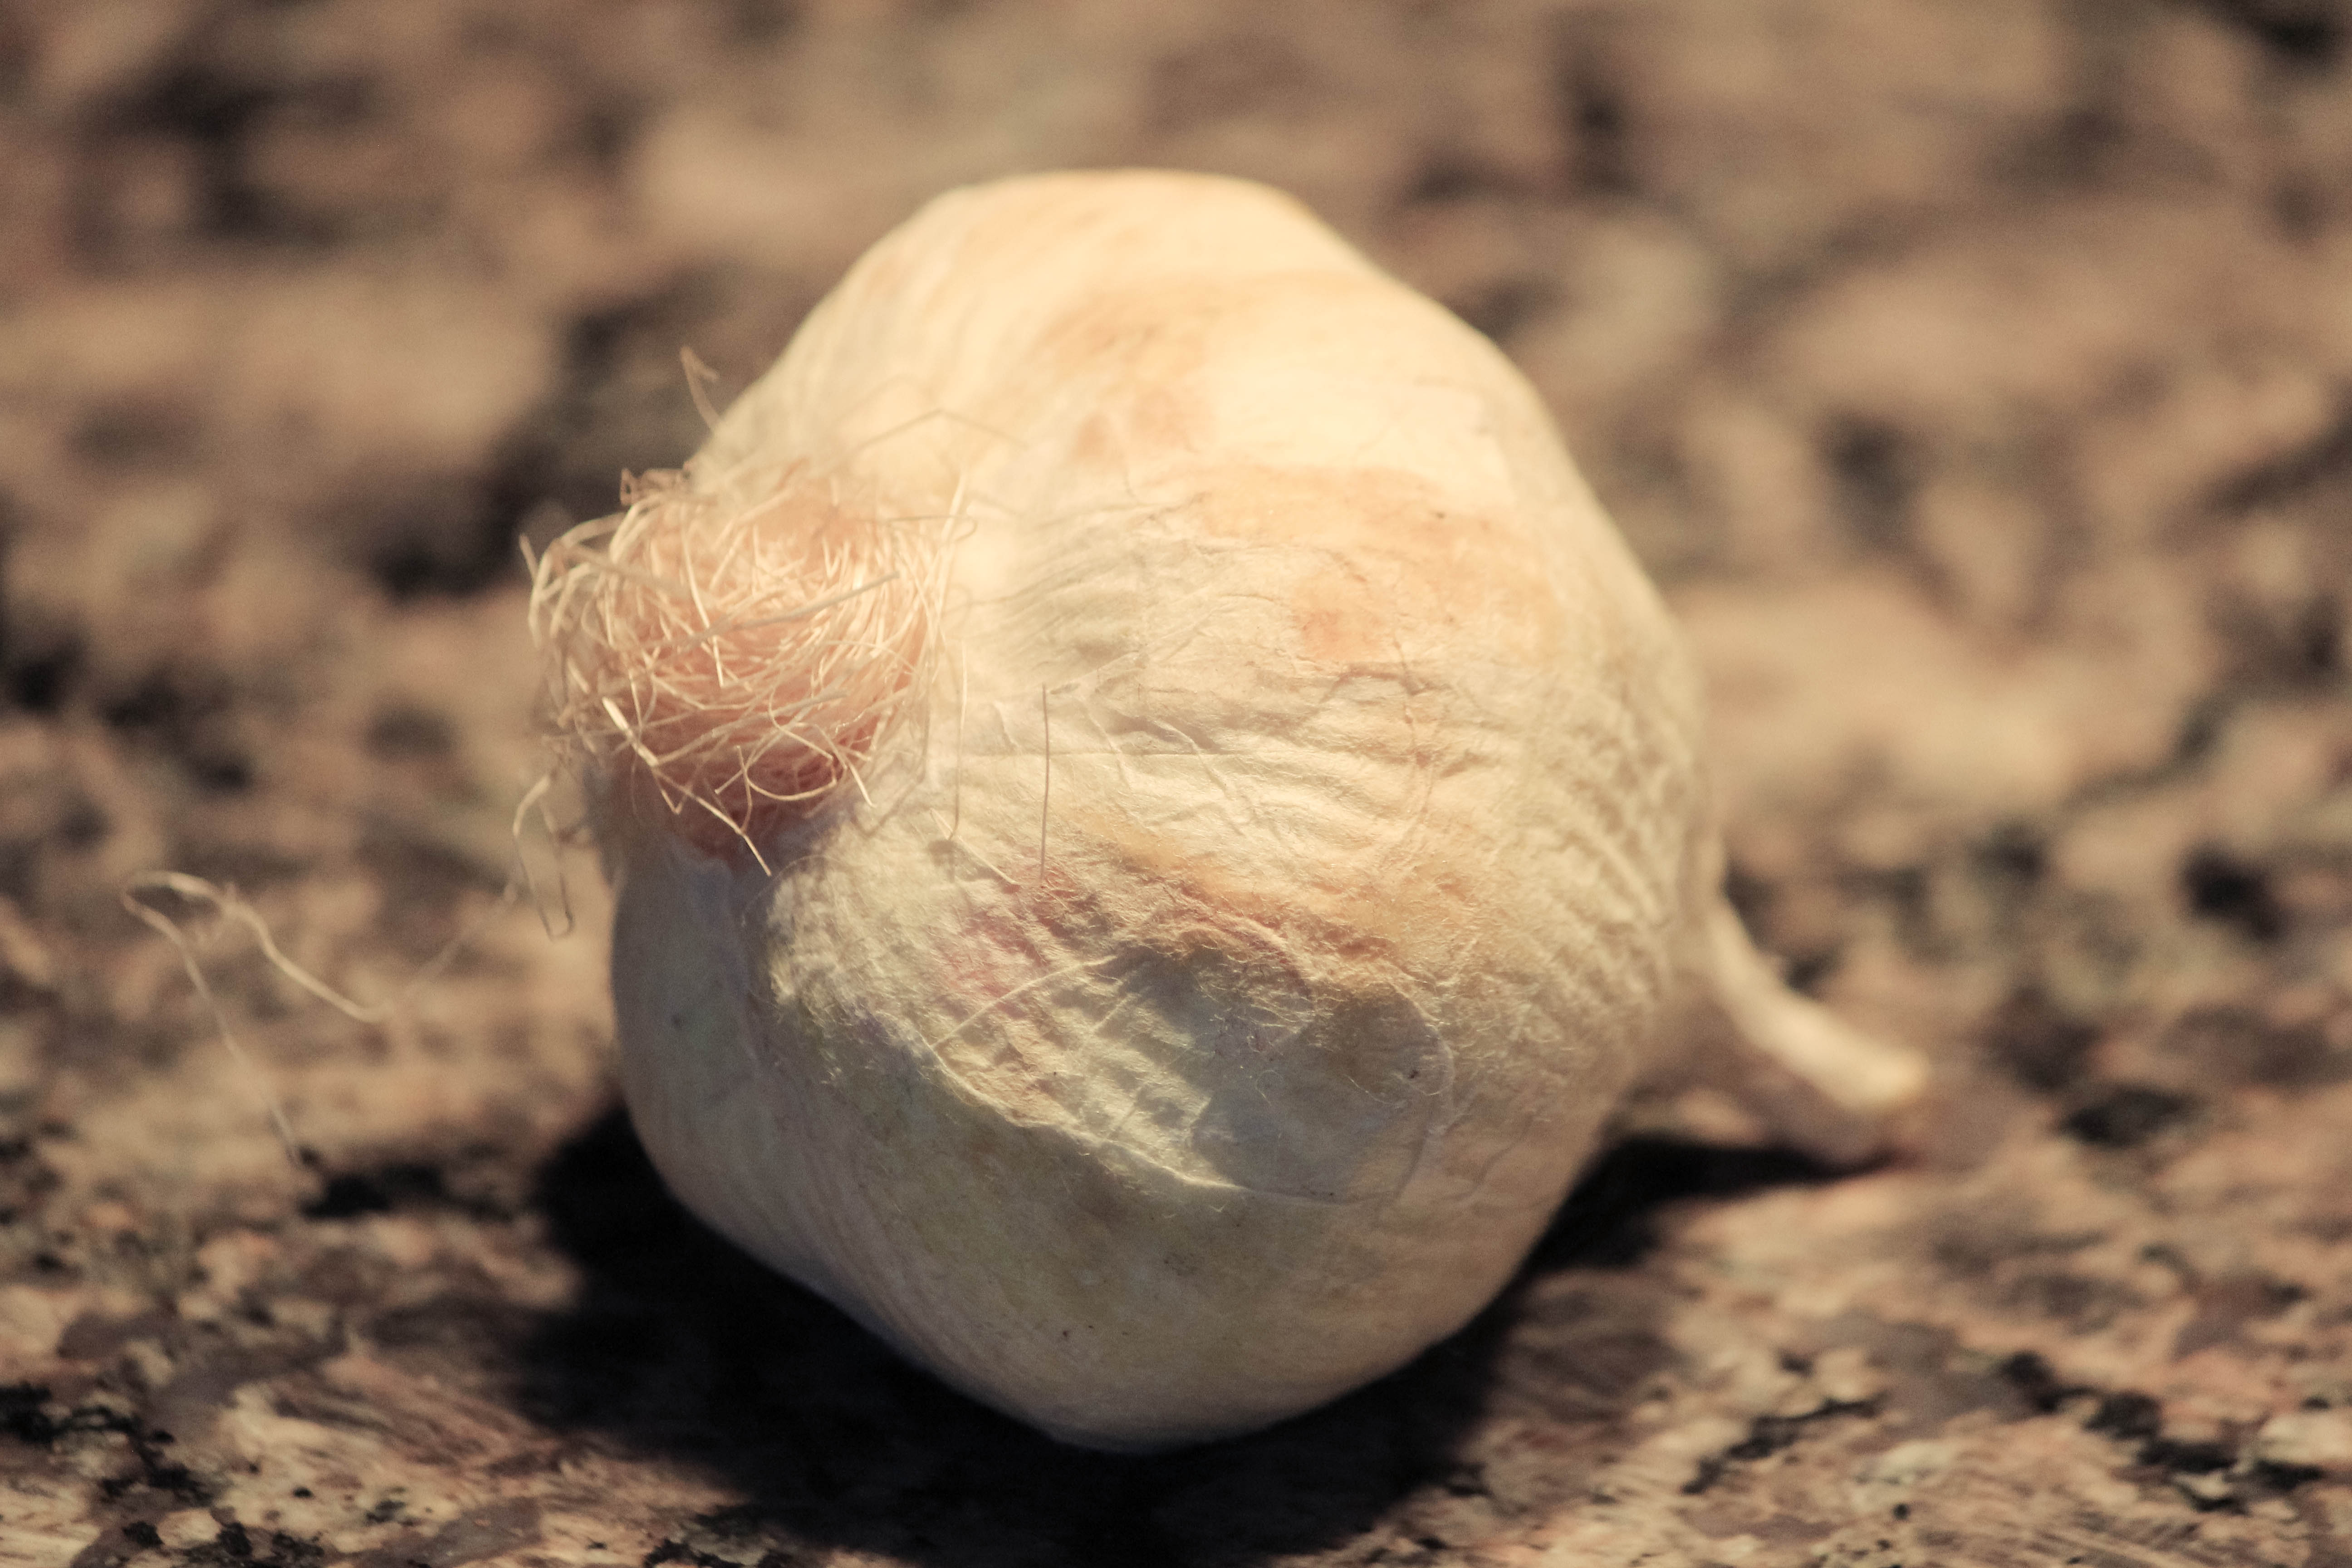
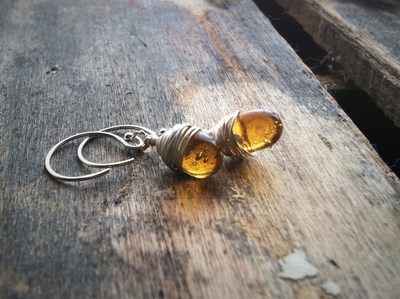
You may think you are getting great pictures. The truth is that you won’t really know until you sit down to edit them. Take multiple pictures and from different angles. This way, when you finally get ready to edit you won’t have to settle for “good enough” because you’ve already put all your materials away.  Make sure to get a really good close up!

4. Edit your pictures!

Even basic editing, such as cropping, can make a huge difference. If you’re taking pictures with your smartphone, it probably comes with built in editing. If not, consider downloading an app such as Instagram. It’s free and you will not be disappointed!

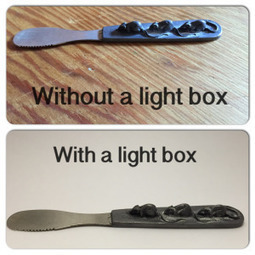
5. Use natural light.

Take your pictures near a window if possible. Avoid using artificial light and never use the flash on your camera as it will not convey the true colors of your item.  If your schedule precludes taking pictures during the day consider buying or making a light box. Check our “Sellers Tutorial” page for how to make a light box of your own!

From: thepreparedmother.wordpress.com

DIY Light Box

DIY Light Box

DIY Light Box 

If you've read the post on how to take great product pictures, you've read about the importance of light in your pictures.  When using natural light isn’t possible or just doesn’t work for your particular needs, a light box is often the next best alternative. This post will demonstrate how to make a DIY Light Box. No need for any fancy materials or supplies. Many of the items are probably things you have at home already!

List of Supplies:
1. Cardboard box
2. Box cutter or X-acto Knife
3. White printer paper or White Tissue Paper (the type found in the gift wrap section)
4. White poster board
5. Portable lamp
6. 100 watt white light bulb
7. Double sided tape (or regular tape that you roll up on itself)

Directions

About the cardboard box. It should be large enough to hold the items you are photographing but not so huge that you can’t store or transport it easily. After assembly, remove the top flaps of the box. You want this part to be open. Next, using your box cutter or X-acto Knife, cut the sides out of the box leaving a small border around the edges. You are going for a “picture frame” look on all sides. Do not cut out the bottom!

Once all your sides are cut out, apply double sided tape to the inside of each “frame”. This is where you will be applying the white paper. The goal is to (as seamlessly as possible) cover the inside of the box with your paper. We are trying to make an environment as free from color and shadows as possible.

Voila, you’ve made a light box! Now get busy taking pictures and posting your stuff. I find it works best if you go into a dark room and put the lamp as close to your box as possible. If you are not getting the desired lighting, add more lamps. I’ve seen examples online using up to 3 lamps at a time.


From: thepreparedmother.wordpress.com

How To: Roasted Garlic

Now that the days are growing cooler, keeping the oven on for close to an hour is much more appealing. If you are cooking a casserole or roast already, why not toss in a couple heads of garlic and make magic in your kitchen!

Roasted garlic is indeed the best thing EVER! If you've done it before, I'm willing to bet that you agree it to be one of the best pay offs for 10 minutes of your time that you can do in the kitchen. While you're at it, go ahead and roast several at once. This is something you can never have too much of, and extra can be frozen for several months. 

The exact cooking time can depend on the size of the garlic heads and the age of your garlic, but in general heads of garlic will roast to perfection in about 45 minutes. To be sure, begin checking them around 30 minutes and keep cooking them until they are to your liking. Don't worry, in order to over cook garlic you would have to really be trying. 

Super-simple method to roasting garlic. 

Supplies:

1 (or 2 or 10) full heads of garlic

Olive Oil

Sharp Knife

Aluminum Foil

Method:

1. Preheat oven to 400F. If your adding this to the oven to roast with another recipe, simply adjust your "check it" time accordingly. 

2. Cut the tip off each full head of garlic. Not much, just enough to expose each clove. Peel away the loose papery bits but leave the inner layer of paper. This will keep all the cloves snug together. 

3. Wrap the garlic in the aluminum foil, leaving it open on the top. Drizzle approx. 1 tablespoon of olive oil on each head of garlic. Allow a minute or so to let the olive oil settle into the head of garlic. Now close the foil over the top, fully wrapping the garlic in the foil. Place the foil wrapped garlic on a baking sheet and place in the oven. Begin checking for the soft, roasted garlicky goodness after 30 minutes. 


How to Make Homemade Dog Treats

How to Make Homemade Dog Treats

When I made changes to my own diet and switched to eating plant-based, whole foods, it only made sense that I started to rethink what I fed my dog, Benny. After all, he’s my baby, my little boy, my heart. So I changed his diet to consist of healthy, whole foods as well, and every day, I prepare his dinner along with mine. Benny is very picky, so finding biscuits and treats that were healthy as well as appealing to him was a bit harder. I decided I needed to learn how to make Benny yummy dog treats at home.

There are a lot of benefits to making your own dog treats: you get to control what ingredients go into them; you can avoid all the preservatives, additives, fillers, and byproducts; you can cater to any of your dog’s dietary restrictions, and you can choose the flavor combinations your pooch loves most. With all of the recalls on dog treats these days, there is nothing more comforting and rewarding than knowing you are giving your fur baby treats that are healthy, safe, and of course, filled with love.

Making homemade dog treats is an easy way to show your dog some extra love. Just be aware of which ingredients may be toxic to dogs such as macadamia nuts, grapes, raisins, chocolate, apple seeds, and large amounts of onion and garlic. Every dog is different, so please check with your veterinarian to see which ingredients are suitable for your dog.

From: www.onegreenplanet.org

How to make chalk paint

How to make chalk paint

So I’ve heard about the glorious chalk paint for a few months now and decided to see what all the hype was about. If you love the shabby look you will l-o-v-e chalk paint. It gives you a nice chalky finish and makes distressing a piece of cake.
One thing I love about chalk paint is it can be used on any surface. AND {bonus} there’s no need for sanding or priming your piece beforehand. Anything that saves me less steps–>I’m there! 😉


From: www.iheartnaptime.net

how to sell at art shows and craft fairs

How To Sell at Art Shows and Craft Fairs

If you are an artist, maker, craftster or otherwise creative then you might have wondered how to sell at art shows and craft fairs. While doing business and selling your creations in a digital age is now easier than ever, there is still a lot to be gained by selling in a physical venue. However, joining the wrong show can be worse for you (and your business) than not joining at all so take the time to research the shows you are considering. Some helpful questions to ask are; Is the show juried or not juried? How much are the booth fees? What is the expected turnout and what are they basing those numbers on? Can you "double up" with a friend? 

These questions and more are addressed in Patrice Lewis' article "Doing Craft Shows: Simple Tips to Make Your Experience Successful". Of course you know that not all venues are created equal and some shows may be great for some but don't work for your particular niche. In general, though, there are a few tell-tale indicators of whether the show you are considering is a "good" one. 

Booth fees and what they say about the show. 

What makes a high booth fee worth it? Look for high-quality vendors with most or all of their products hand-crafted; look for excellent and broad advertising; and find out the anticipated attendance. If a show attracts 70,000 people, a $1,000 booth fee may be worth it. If a show is expected to attract a maximum of 500 people, make sure the booth fee is low.

For more great information on the topic, please visit the original article here. 


Lemon Sugar Scrub

Lemon Sugar Scrub

Lemon Sugar Scrub

I’m all about using what you have, so when I found this Lemon Sugar Scrub DIY while searching the internet for recipes to use my plethora of lemons, I jumped right on it! All the recent rain in Northern California has given a boost to our fruit trees and we’re overflowing with lemons and oranges. While no one is complaining, (maybe just a little bit) there is only so much lemon-curd, lemonade and lemon bars that one family can handle.

Have you ever planted too many zucchini plants and then became that lady? That’s me right now with the lemons. People see me coming with a plastic grocery bag of lemons and suddenly become very interested in something on their shoe. Seriously, would it kill you to make eye-contact with me?

In this DIY from www.iheartnaptime.net, learn to make you very own Lemon Sugar Scrub. It’s a good idea to make a double batch, I’m willing to bet you will want to keep some for yourself.

From: www.iheartnaptime.net

Reach Your Healthiest Weight

Why do most diets fail? It's not because we're lazy or lack willpower. Almost every time, the reason diets backfire is because we restrict too much.

When you dramatically reduce your caloric count, your body instantly perceives danger. Your inner alarm system that protects you from starvation kicks in and slows your metabolism. You go into starvation mode and overeat. And inevitably when you stop dieting, you regain your former weight plus some.

Think about what happens when you skip breakfast, work through lunch, and finally return home in the evening. You eat everything in sight, right? You feel stuffed, sick, guilty, and regret ever entering the kitchen in the first place.

Why does this occur? After all, you are a reasonable person. You know you shouldn’t overeat.

via How To Stop Overeating & Reach Your Healthy Weight: A Doctor Explains – mindbodygreen.com.

Perfect Seared Fish

Perfect Seared Fish

Wishing for the perfect seared fish?

There is nothing quite so wonderful as a perfectly seared piece of fish: Crispy crust on one side,  just-barely-done meat in the center. It is one of the great tastes of the world, and it is my go-to method for cooking most any fish.

I was primarily a seafood cook for 15 years before I ever touched a piece of wild game. Fishing is in my DNA, and I am proud to say my parents taught me well how to catch all sorts of sea creatures. I did not learn this technique from them, however. I learned how to sear a fish when I was a line cook years ago. Pan-searing is a classic restaurant method of cooking fish.

The technique works on any fillet or fish steak. I am using striped bass here, but most fish will do. The only fish that don’t respond well to searing are those with lots of bones, like shad or very small fish, like sardines. Even so, I’ve seared deboned sardines and it worked OK.

It is not hard to master this skill, but there are some tips and tricks you need to know.

A few things first. Most fish have very tasty skin if it is cooked properly. Some, like triggerfish or sturgeon or swordfish, have skin so thick or rubbery that it’s essentially leather. Others, like mackerel, have skin so thin you can’t get a decent crisp on it. But ye olde fish, such as bass, perch, salmon, flounder, snapper or rock cod, have excellent skin that crisps nicely. Be sure to scale the fish (or have your fishmonger do it), but leave the skin on the fillet.

Here’s how I sear fish:

From: honest-food.net

How to Burn Off a Margarita

How to Burn Off a Margarita

Need to know how to burn off a margarita?

This week I met up with a couple of girlfriends for a welcome home dinner. We went out for healthy Mexican food at Porque No?, one of my favorite restaurants here in Portland. They have tasty fish tacos, homemade tortilla chips, and delish guacamole. They also make a mean margarita. I ordered one, but I got way more than I bargained for—a margarita served in a full-on pint glass. (As in, way bigger than the one below:)

A pint of margarita means essentially two cocktails in one, at least. Margaritas are already known for being one of the more sugary, calorie-loaded cocktails out there so I knew I was breaking some sort of rule by drinking it. (At least I stopped at one!) When I checked the calorie count for this tequila spiked treat I found that a 3.3 fl oz serving has 153 calories. Not bad, until you factor in that the one I had was around 16 fl oz! Multiply that number by 4 and you’ve got over 600 calories in a glass!

(Too bad they weren’t following our recipe for a Skinny Margarita!

What are a few ways I could have burned off the 612 calories in this big and tasty drink?


From: www.dietsinreview.com

Make Your Own Hot Cocoa Mix!

Make Your Own Hot Cocoa Mix!

I secretly love those little packets of hot cocoa mix — but I recently decided to quit buying them and start making my own. The nice thing about making your own hot cocoa mix is that you have free control over what goes into it (and what stays out of it). Like yours super chocolatey? No problem. Want to take down the sugar and add a bit of cayenne and cinnamon? Do it. Today, I'm sharing my recipe for basic hot cocoa mix, plus a few suggestions for mix-ins that I've been loving lately.

The basic mix itself should stay fresh for at least 4 to 5 months if kept stored in an airtight container, out of direct sunlight, and at room temperature — no need to refrigerate. (I should say that the mix I make never sits around in our cupboards that long, since we drink it up, but there's nothing that would go terribly rancid here or that I'm worried would spoil).

All winter, I've also been sipping Theo's drinking chocolate. I initially fell for it because it contains actual chunks of chocolate — it's not a dusty, dry powder. So for my homemade recipe, I decided to hand-chop some chocolate so it would be more in line with Theo's delicious mix. If you're pressed for time, you could chop the chocolate in a food processor instead; I just like the uneven nature achieved by hand chopping it.


From: www.thekitchn.com